Thursday, April 10, 2014

Projects Projects Projects....

Wednesday, April 8, 2014--

Well, it's obvious Mrs. Walton is not a great blogger!  Well, at least not on this.  I am EXCELLENT at keeping up to date on our Wilchester Art facebook page!  So, if you are looking for stuff and what is going on on a much more frequent basis, check www.facebook.com/wilchesterart

Let me start with some of the projects I have done since I have started at WCE!

First off, we have some Jim Dine Artwork.
In the first grade lesson, since I did not have ink or plates, or tools for printmaking, we did monoprints using tempera paint and sheet protectors.  I have to say they turned out really well!
We started by each student added tempera paint blobs on top of a sheet protector which had a heart drawn on a sheet of paper inside of it.  They had to work somewhat quickly so it wouldn't dry on them.  Then, they lined up their paper and lightly dropped it on top of the sheet protector and lightly rubbed the paper; lifting the paint from the sheet protector.  When they peeled it off, they had the mirror image of what they had originally put down with paint.  After it was dry, we went around the blobs with sharpie to keep and make the shape of the heart more recognizable.  We used either warm colors or cool colors for the heart.  Once everything was finished, they cut the heart out leaving a "picture frame edge" around the heart.  Then, they glued it to black paper and cut a picture frame out again.  Then, they mounted the final piece on a piece of construction paper in the opposite color scheme.  They turned out beautiful and the oohs and ahhhs of the kids as they pulled their print was awesome.  They wanted to do many of them!
1st Grade Jim Dine Hearts by Mrs. Walton's Art Room


Wednesday, April 9, 2014

3rd Grade Wiggle Feet Clay Birds

Probably my favorite project so far....
The wiggle feet birds are a HIT!

We started by forming the body of the bird with a pinch pot type of practice.  They used their thumb to get the height of the bird by pressing it into a ball of clay.  Then, using their fingers, they spread out the underside of the bird to give him his width or body shape.  Then, we used two small spheres of clay to make the eyes and another cone of clay for the beak.  We discussed slip, score, wetting, and affixing the clay to each other and what would happen if they didn't follow those directions.  Then, they formed the wings, poked the eyeballs, and split the beak to open it up.  Lastly, we poked holes in the top of the head and for the legs.
We let them dry and fired them.  Then, they glazed them the next two class periods.
3rd Grade Wiggle Feet Birds


3rd Grade Wiggle Feet Birds, a class set
After glazing, and the many oooohs and ahhhhhs of them coming out of the kiln a "new color", we added the legs with small colored wire and tons of beads (I still have beads on my floor!), wires out the top of their heads if they wanted, and then feathers!  They are by far, one of the cutest clay projects I have done with kiddos!  I am so proud of the way they turned out!
3rd Grade Wiggle Feet Birds, sitting in a tree

3rd Grade Wiggle Feet Birds, Sitting in a tree

3rd Grade Wiggle Feet Birds, Ready to go on display


More Jim Dine, 2nd grade style

Yep, another late project post!
These bold bright prints are made by my talented 2nd graders.  We looked at and discussed the art of Jim Dine and showed them the image called Mandala by Jim Dine.  We discussed how it incorporated the styles of Pop Art like Warhol by the broken up spaces of color.  We disussed how it had the feel of impressionism like Starry Starry Night by the movement lines around the heart.  We discussed how Jim Dine usually had very defined subject matter, however, it wasn't "PERFECTLY drawn".  Sometimes, it looked kinda messy.  Sometimes his lines were not perfectly straight.  First, the kids worked on painting their boxes.  We used small flat brushes and we talked about painting in straight lines to keep the painting smooth and even.  We discussed loading the brush with paint.  We looked at how the paint, when pulled straight down the page, would push it's way through to the other side of the brush and we could just flip the brush over and keep moving until it ran dry.  We talked about where to start and stop the brush strokes to keep them nice and even and neat.  Then, the kids did a monoprint (like 1st grade technique), and used the sheet protectors to draw their own heart.  I showed them styles of painting on the plastic and what would happen when you PAINTED the black paint rather than dabbing the black paint and what the differences looked like when printed.  I did a quick demonstration to show them how to print and off they went!  After they finished the printmaking, they used the "impressionist" lines to fill in the background with movement lines in various colors.  I love the differences in their projects and how bold the image became.
2nd Grade Jim Dine Monoprint Hearts

Saturday, February 15, 2014

Sub in the Art Room? I try to make it not so scary!

February 13-14, 2014

Yesterday, I had my first sub at my new school.  I am usually very thorough with my lessons for a sub as the art room can be a scary place--especially if you aren't an artsy person!  I know the subs at this school have been here forever.  They know the kids all by name.  They know the schedule, the good, the bad and the ugly and every thing in between!  BUT, I still did my lessons the same.  As an art teacher, I want for people to know where things are.  I describe, in detail, how to do things.... how to turn the projector on and off, where the sketchbooks are located, etc.... very detailed.
This time I included photos since I have a new room and all new lovely things.  I made that part generic and plan on laminating it in my folder so it can always be used.  But, in case you are looking for photos and ideas on what you can leave for your substitute... meet my art room and my sub descriptions!
Dear Substitute:
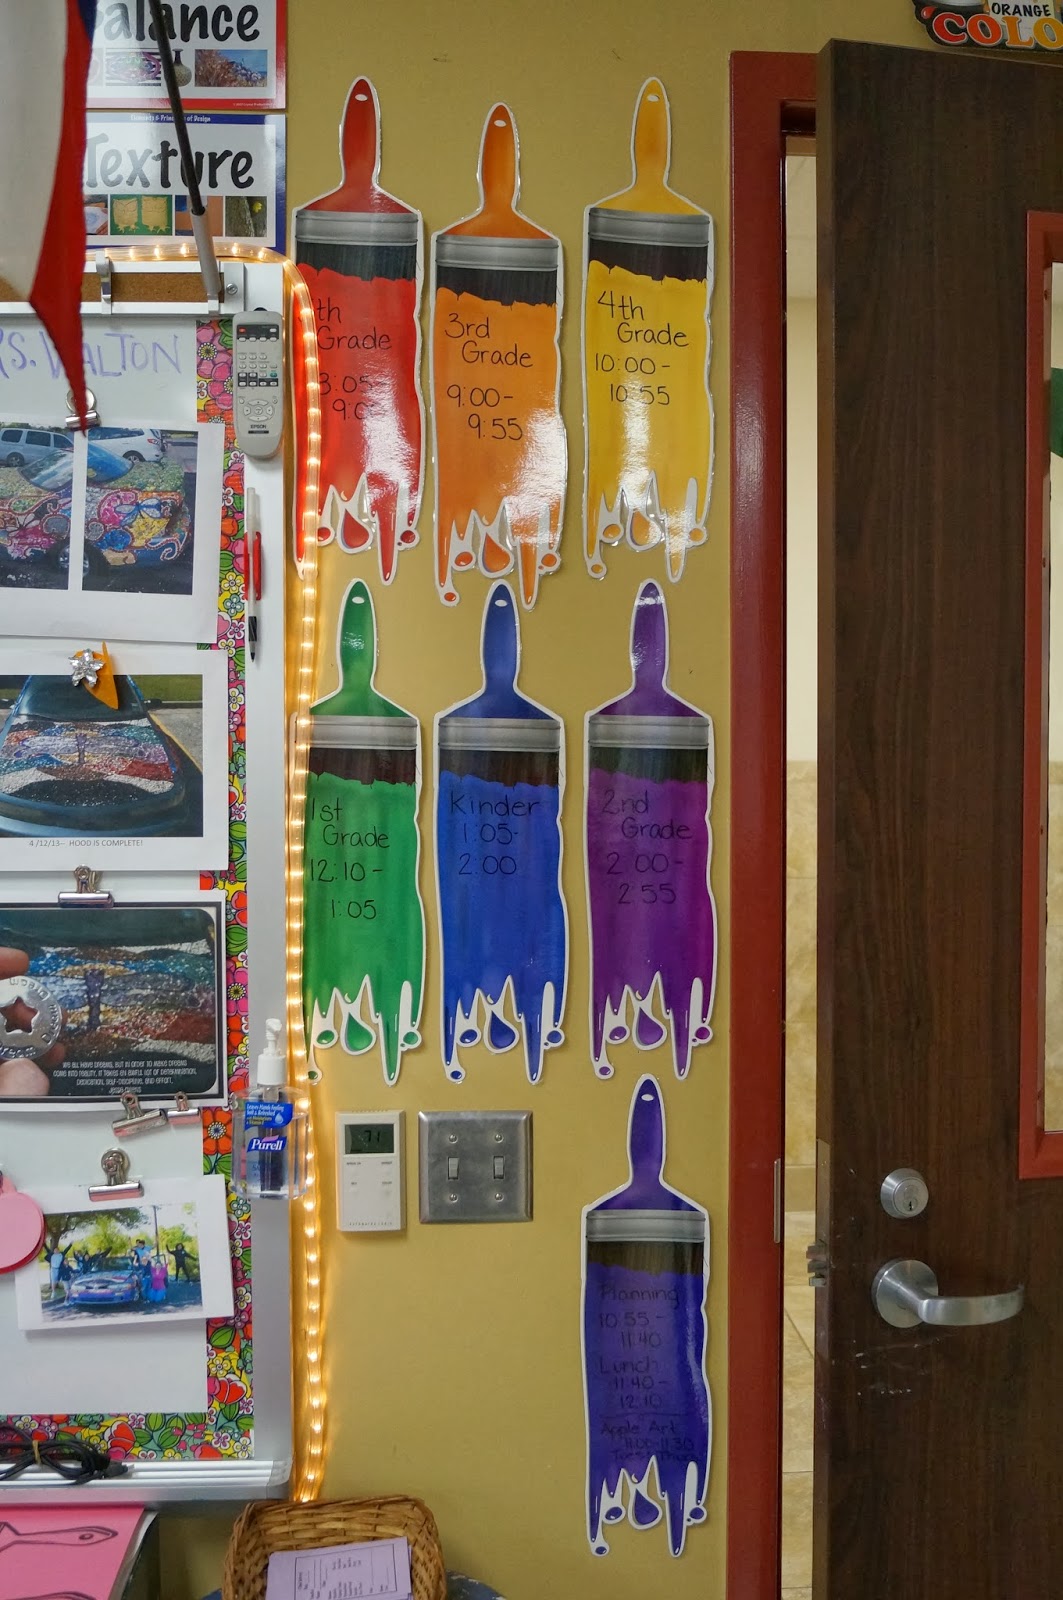
Here is the daily class schedule.  And also the way I color code my grade levels.  Located right next to the front door.

Here's my document camera.  It has a button on the back that lights up when it's on.  Anything you want to project, you have to place it backwards from the way you are looking at it.  See Paintbrush report card above.

To turn on the projector, hit the red button one time.  To turn it off, press twice.
The projector remote is located at the top right corner of my bulletin board and is velcro'd there.

My behavior brushes.  If a class is great for you, leave it golden.  If you have problems, please remind them about behavior.  If you continue to have problems, the brush can be turned over to silver, or tarnished.

All supplies needed for the day will be in buckets.  It is all color coded (please excuse the yellow lid on the box.  It should be on the yellow table!)  The tape on the table shows table color.  The glue is labeled with a red tag and the scissors are red as well.  Markers are face down in the buckets so the ink stays at the tips.

You shouldn't be doing clay while I am not here!  I wouldn't do that to a substitute!  But... this cabinet houses all the stilts for the kiln and the clay tools.  It also holds the shelves for the kiln as well as other needed item for clay.

Glazes, Clay, molds, slab roller, extruder, and potters wheel are located on this side of the kiln room.  The glaze is for clay only.  Not for paper.


Free Draw paper, scrap construction paper, and floor clipboards/wipe off boards are kept in this area near the beige carpet and brown book cases.  There are also books if you run into a bind and need to read the kids a story!
The bottom crates are full of laminated images from calendars.  They are welcome to use those for reference materials!

This cabinet between the windows houses the daily projects.  Each drawer, labeled, is for a different day.
Inside, you will find folders for each grade level you see that day.
The folders are labeled with a grade number and a letter of the week.  So, this drawer shows Wednesday classes.  Each stack has a folder that corresponds to the tables.  That way you don't have to waste time passing out papers.  Just set the folders on the correct corresponding tables.  They can turn their papers in at the end of the period.

Posterboard cabinet.  Crayons show colors of posterboard inside.

This cabinet, between the sinks, is where the construction paper is housed.  Again, the colors on the outside tell you what colors are in each drawer.  Towards the bottom, are some various colors (brights).

Sinks:  For the Red and Yellow table student's to use.  Below towels, are cleaning supplies.

Sinks:  For the Green and Blue table student's to use.  Below towels, are cleaning supplies.


"Office"/Closet space.  Pardon the mess.  The hanging organizers have folders kept in there for student paperwork per grade.

Bookcases in the "office".  My "Screamer" named Violet on top.  I made her when I was in High School art class!  She's a little banged up, missing her teeth and fingernails, but she's made it this far, I think I'll keep her!  :)

"Office space"/closet space again.  Please excuse the mess.

After school duty:  Go out this side door and head to the front of the school. You'll monitor bike rack duty until kids get their bikes and head home.  (also, the drying rack is placed here.  Just don't open the door when it's windy and have projects fly away!
Before school duty:  In the cafeteria, you'll stand by these doors and greet kids as they get off the bus!  Don't get locked out!!


SO!  Who is ready to sub in the art room!?

Tuesday, February 11, 2014

Visual Arts Scholastic Event 2014 in Cypress, Texas

Saturday, January 8th--

I LOVE VASE.  I have worked the VASE art contest for the last 8 or 9 years, I would guess.  It is a magical place where thousands of kids bring the most amazing artworks to be judged by art judges who are equally impressed with the talent of these young high school kids!
Amazing I tell ya!  I usually work what is called "tabulations" which means I enter the scores from all the jury sheets for each piece of art.  Thousands of them!  Hoping that we can account for each one at the end.  I get to spend the day with the most wonderful people as well.
Loren and I have taught art since 2002 together and are the best of friends.  We share art ideas and know that the other is probably still awake at 3am.  Usually because I am just going to bed and he's just getting up!  He switched schools two years ago to be closer to home, so this is one of two events we count on to see each other again!
Crystal joined our district several years ago and hosted VASE at her campus where I got involved with it, maybe for the first time.  That year, I did qualifications--making sure all the art was following the rules before allowing it to go be judged.  Crystal is beyond amazing and such a hard worker (and has an adorable munchkin to boot!).  If she tells you it will be done, it will.  She's a great friend and one you want on your side!
Suzy retired last year.  She is an inspiration.  She has SO much energy.  She isn't going to give up on the art stuff either!  She actually started teaching at the previous school I worked at.  This year, she is TAEA President Elect, which means she oversees all the fabulous art teachers in Texas.  I'm so glad she worked in our district and that I can keep up with her.  She's got great ideas and tried and true ideas!  Just ask about using orange go-jo as hand soap in the art room!!!  :)
Love these guys!!!
VASE is the high school level art contest.  It allows students to bring in artwork and stand before a judge and explain the process, techniques, reasoning, and meaning of their artworks.  It's amazing to see.  Truly amazing artworks.  Jr. VASE is the middle school contest containing the same rules and process and TEAM is the elementary art contest.  Not only is it cool to see what the kids have created, but to see different lessons that art teachers teach.  A wealth of information and ideas all in one room.  I'll leave you with some images from the event.... Be prepared to drool!
Raku maybe?

Cloth Mache dragon

Ceramic Balls in bowl

Bleeded background with ink

This car was drawn on a map

Printmaking

Self Portrait done on cardboard

Paint on black.


Drawing.... yes, really.

Oil pastel


Asian inspired pottery.

The glazing on this is STUNNING!!!!

Monster Cloth Mache'

Made of cardboard

Mixed media vase with rope.  The flowers were beautiful!

Skittle portrait


This is done on slat board flooring!

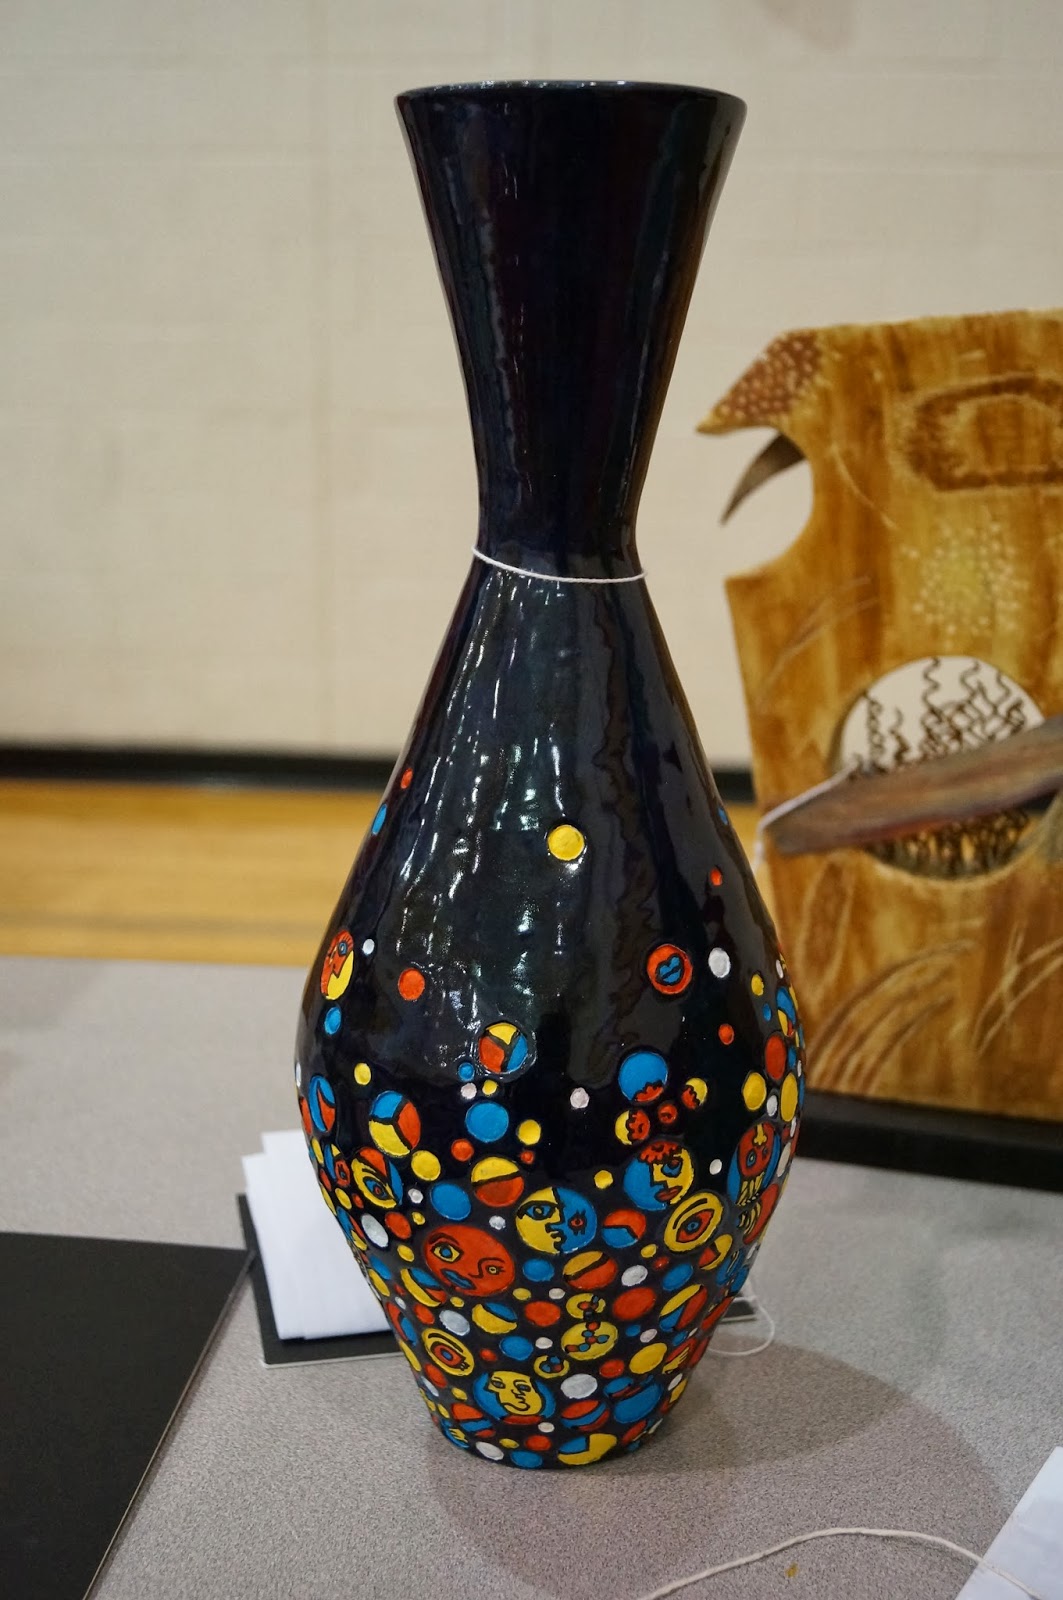
Cool vase done in glaze and acrylic

Detail.  Wow!

This vase is HUGE!

COLLAGE!


This is canvas with shattered mirror on it.  The entire thing sags in the middle.  It was neat!